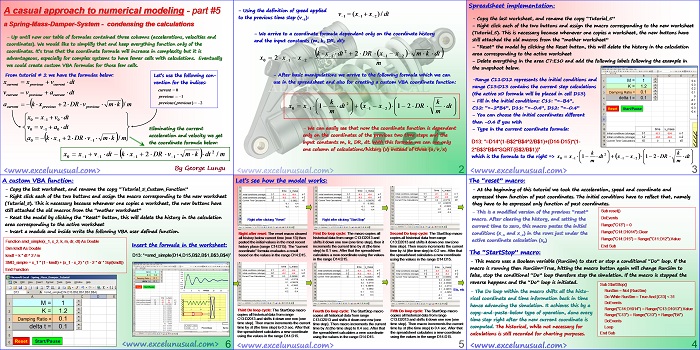
In this tutorial, most of the calculations for the numerical simulation a SMD (spring-mas-damper) system will be consolidated into a single formula, the coordinate formula.
In this case, in order to calculate the coordinate at the end of a any time step, we will need just the coordinates from the previous two time steps and of course the input parameters (constants). These input parameters are: mass, damping ratio, spring constant and time step.
There will be no more need for velocity or acceleration computations. At the end of the presentation a simple user defined VBA function is demonstrated in a new worksheet.
![]()
A casual approach to numerical modeling – part #5 – a Spring-Mass-Damper-System – condensing the calculations
by George Lungu
– Up until now our table of formulas contained three columns (accelerations, velocities and
coordinates).
We would like to simplify that and keep everything function only of the
coordinates. It’s true that the coordinate formula will increase in complexity but it is
advantageous, especially for complex systems to have fewer cells with calculations.
Eventually we could create custom VBA formulas for those few cells.
From tutorial # 2 we have the formulas below: Let’s use the following convention for the indices:
<excelunusual.com>
– Using the definition of speed applied to the previous time step (v-1):
– We arrive to a coordinate formula dependent only on the coordinate history
and the input constants (m, k, DR, dt):
– After basic manipulations we arrive to the following formula which we can
use in the spreadsheet and also for creating a custom VBA coordinate function:
– We can easily see that now the coordinate function is dependent
only on the coordinates of the previous two time steps and the
input constants m, k, DR, dt. With this formula we can use only
one column of calculations/history (x) instead of three (a, v, x)
<excelunusual.com> 2
Spreadsheet implementation:
– Copy the last worksheet, and rename the copy “Tutorial_5”
– Right click each of the two buttons and assign the macro corresponding to the new worksheet
(Tutorial_5).
This is necessary because whenever one copies a worksheet, the new buttons have
still attached the old macros from the “mother worksheet”
– “Reset” the model by clicking the Reset button, this will delete the history in the calculation area corresponding to the active worksheet
– Delete everything in the area C7:E10 and add the following labels following the example in the snapshoot below.
-Range C11:D12 represents the initial conditions and
range C13:D13 contains the current step calculations
(the active x0 formula will be placed in cell D13)
– Fill in the initial conditions: C11: “=-B4”, C12: “=-2*B4”, D11: “=-0.4”, D12: “=-0.4”
– You can choose the initial coordinates different than -0.4 if you wish
– Type in the current coordinate formula: D13: “=D14*(1-B$2*B$4^2/B$1)+(D14-D15)*(1-2*B$3*B$4*SQRT(B$2/B$1))”
<excelunusual.com> 3
The “reset” macro:
– At the beginning of this tutorial we took the acceleration, speed and coordinate and
expressed them function of past coordinates. The initial conditions have to reflect that, namely
they have to be expressed only function of past coordinates.
– This is a modified version of the previous “reset” macro. After clearing the history, and setting the current time to zero, this macro pastes the initial conditions (x-1 and x-2) in the rows just under the active coordinate calculation (x0)
Sub reset()
DoEvents
Range(“C13”) = 0
Range(“C14:D1014”).Clear
Range(“C14:D15”) = Range(“C11:D12”).Value
End Sub
The “StartStop” macro:
– This macro uses a Boolean variable (RunSim) to start or stop a conditional “Do” loop. If the
macro is running then RunSim=True, hitting the macro button again will change RunSim to
false, stop the conditional “Do” loop therefore stop the simulation. If the macro is stopped the
reverse happens and the “Do” loop is initiated.
-The Do loop within the macro shifts all the histo-rical coordinate and time information back in time hence advancing the simulation. It achieves this by a copy-and-paste-below type of operation, done every time step right after the new current coordinate is computed. The historical, while not necessary for calculations is still recorded for charting purposes.
Sub StartStop()
RunSim = Not (RunSim)
Do While RunSim = True And [C13] < 31
DoEvents
Range(“C14:D1014”) = Range(“C13:D1013”).Value
Range(“C13”) = Range(“C13”) + Range(“B4”)
DoEvents
Loop
End Sub
<excelunusual.com> 4
Let’s see how the model works:
Right after reset:
The reset macro cleared all history below current time (row 13) then pasted the initial values in the most recent history place (range C14:D15). The “current coordinate” formula evaluates a result based on the values in the range D14:D15.
First Do loop cycle:
The macro copies all historical data from range C13:D2013 and shifts it down one row (one time step), then it increments the current time by Dt (the time step) to 0.1 sec. After that the spreadsheet calculates a new coordinate using the values in the range D14:D15.
Second Do loop cycle:
The StartStop macro copies all historical data from range C13:D2013 and shifts it down one row (one time step). Then macro increments the current time by Dt (the time step) to 0.2 sec. After that the spreadsheet calculates a new coordinate using the values in the range D14:D15.
Third Do loop cycle:
The StartStop macro copies all historical data from range C13:D2013 and shifts it down one row (one time step). Then macro increments the current time by Dt (the time step) to 0.3 sec. After that the spreadsheet calculates a new coordinate using the values in the range D14:D15.
Fourth Do loop cycle:
The StartStop macro copies all historical data from range C13:D2013 and shifts it down one row (one time step). Then macro increments the current time by Dt (the time step) to 0.4 sec. After that the spreadsheet calculates a new coordinate using the values in the range D14:D15.
Fifth Do loop cycle:
The StartStop macro copies all historical data from range C13:D2013 and shifts it down one row (one time step). Then macro increments the current time by Dt (the time step) to 0.4 sec. After that the spreadsheet calculates a new coordinate using the values in the range D14:D15.
<excelunusual.com> 5
A custom VBA function:
– Copy the last worksheet, and rename the copy “Tutorial_5_Custom_Function”
– Right click each of the two buttons and assign the macro corresponding to the new worksheet
(Tutorial_5). This is necessary because whenever one copies a worksheet, the new buttons have
still attached the old macros from the “mother worksheet”
– Reset the model by clicking the “Reset” button, this will delete the history in the calculation
area corresponding to the active worksheet
– Insert a module and inside write the following VBA user defined function.
Insert the formula in the worksheet:
Function smd_simple(x_1, x_2, k, m, dr, dt) As Double
Dim kmdt As Double
kmdt = k * dt ^ 2 / m D13: “=smd_simple(D14,D15,B$2,B$1,B$3,B$4)”
SMD_simple = x_1 * (1 – kmdt) + (x_1 – x_2) * (1 – 2 * dr * Sqr(kmdt))
End Function
by George Lungu <excelunusual.com>


